Showing posts with label Computer Tutorials. Show all posts

Tuesday, January 25, 2011

Snipping Tool

Here's a quick little cool tutorial that my brother showed me the other day. When we do giveaways and pick a commenter, we like to show the comment in the winner post, as do most blogs. Now a lot of people may have already known this, but for me, anytime I wanted to do that I would have to press the PrtSc (Print Screen) button, paste it into paint or some other editing program, crop out the part of the page that I want to use, save it as a picture, then upload it onto the post. It gets the job done but is kind of a pain in the butt. Well if you have Windows Vista or newer there is a cool program called Snipping Tool that is found in the accessories when you go to all programs (same place as the calculator and paint). Now if you ever want to snip out a comment or anything else for that matter, all you have to do is have the page pulled up that you want to copy from

Then pull up the snipping tool, it will look like this

I usually just leave it as rectangle because that's usually what I need then just click and drag a rectangle around the part that you want to copy and hit the save (disk)  button on the top.

Then all you have to do is upload your newly saved pic and your done! So easy, just thought I'd share :)

Monday, November 22, 2010

Cupcake toppers

I love the little cupcake toppers that have been all over the place lately, but I don't really have the spare cash to spend on something like that (aka- my husband would kill me if I spent money on something so frivilous). So I decided to make my own and I thought that I would share a quick tutorial on how to do it! I used microsoft publisher because I know that not everyone has Photoshop (I wish!!).

The first thing that you do is open up a blank page in publisher.  Use the auto shapes to make a circle on the page.


Next right click on the circle and go down to "Format AutoShape". Click on the size tab and set the height and width that you would like. I did 3 inches. Then check the "Lock aspect ratio" box so that if you need to resize anything, your shape will stay in a circle.


Now copy the circle and paste it back down, then resize it to just a little bit smaller and place it inside of the larger circle.


Next I opened up a second publisher document and inserted a picture from file of a sheet of scrapbook paper. For this I used paper from Shabby Princess. They have a ton of cute papers and they are free-ninety-nine. Sweet! Decrease the size of the paper to a similar size of your circles. After it is resized, right click on the image and click on "Save as picture". Repeat this step for a second coordinating paper.


Now right click on the larger circle and click on "Format AutoShape" again.


Under the "Colors and Lines" tab, click on the arrow for the fill color and click on "Fill Effects".


Now click on the "Picture" tab and then click on the "Select Picture" button.


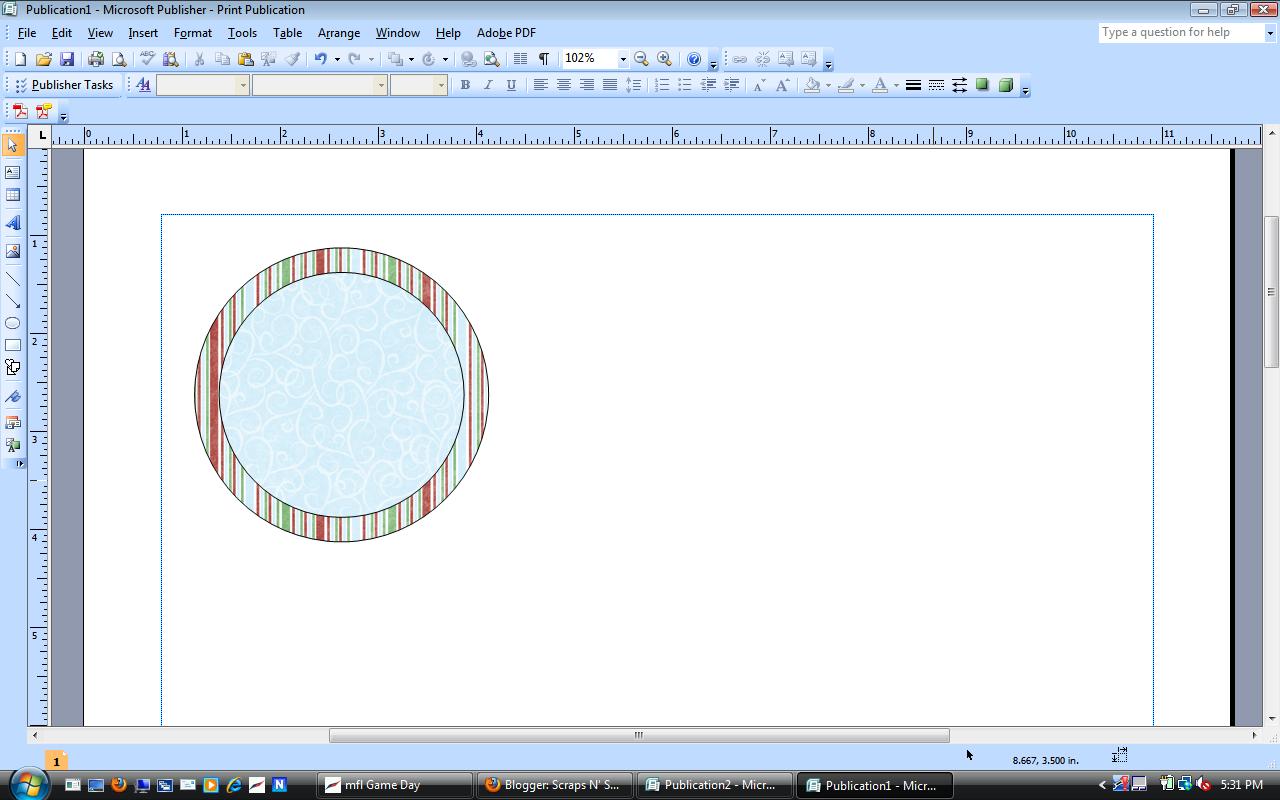
Find the picture of the downsized scrapbook paper and select it. Then hit ok.


It should now look like this.


Repeat these steps for the inner circle with your coordinating paper. Now your basic circle topper is made.


Now insert some cute text inside your circle. I used a font called "Lima Bean" that can be found here along with a ton of other cute fonts. Again, free. I love :)


Then add a fun little graphic to make it uber cute. This tree comes with the holiday magic pack from Shabby Princess. (The paper is from the same pack.) I also changed the font color to match.


Then I did a quick select all and copied the image then pasted it multiple times for the amount that I needed.


Then print those babies off and cut them out. Easy Peasy and super cute, and FREE!! Whoo-hoo! Give it a try for your next party and get a look exactly how you like it!

 
Simply Yours Designs: Cute Blog Designs