Showing posts with label Sewing. Show all posts

Wednesday, January 26, 2011

Conversation Heart Frames

This was a fun little project that I whipped up last night. It's not actually what I was planning on doing (I'll get that one up later) but this idea popped into my head and I just had to get them done! Welcome to the

Conversation Heart Frames
{for V-Day}

So to start out, cut a heart pattern out of some card stock (easy-peasy)

Next take 3 different fabrics and cut squares large enough to fit your heart. Apply some Heat-n-Bond to the wrong side of all pieces.

Now flip those babies over and trace your heart pattern onto the back

and cut the suckers out.

Next I cut off a long strip of a canvas drop cloth and ironed the hearts onto it in a row, leaving enough space in between each heart that I can cut them apart and fit them into an 8x8 frame.

Then cut in between each one and sew the hearts down. I did a zig-zag stitch at less than a 1 length and at a 5 width and went all the way around each one.

Then I took my 8x8 frames, taped the canvases down around the cardboard on the inside and placed them inside.

When that was done, I cut out the words SWAK, LOVE, and KISS ME out of vinyl and applied them to the glass on the outside of the frame and that is it!

Super easy, and a really cute, fun, Valentines decoration that you can vary to fit any scheme you want!

Monday, January 17, 2011

Prairie Princess Skirt Tutorial

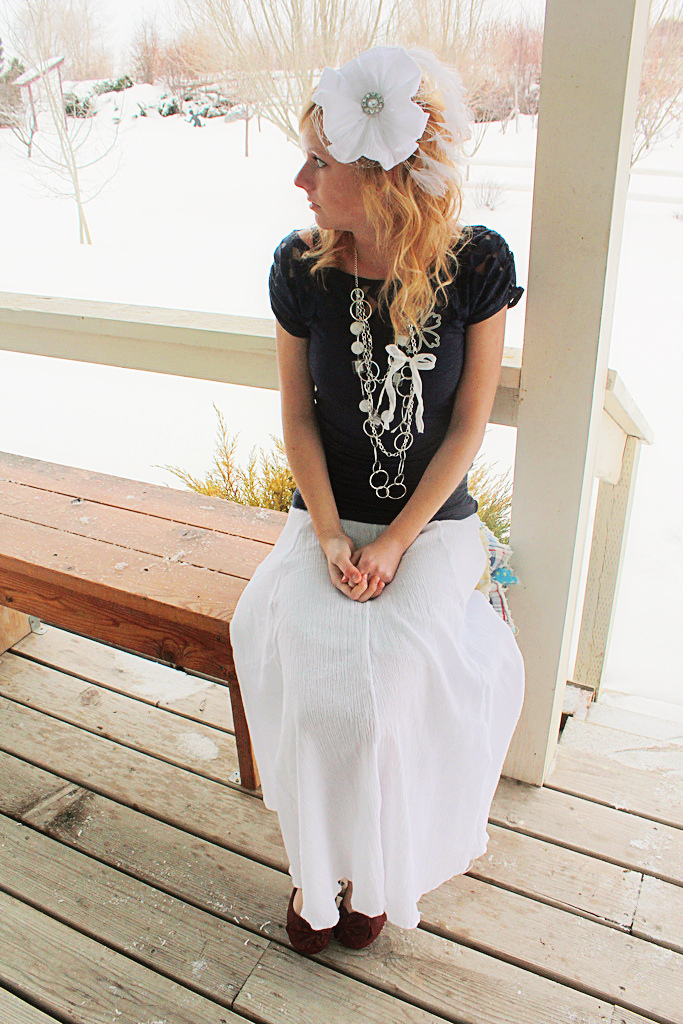
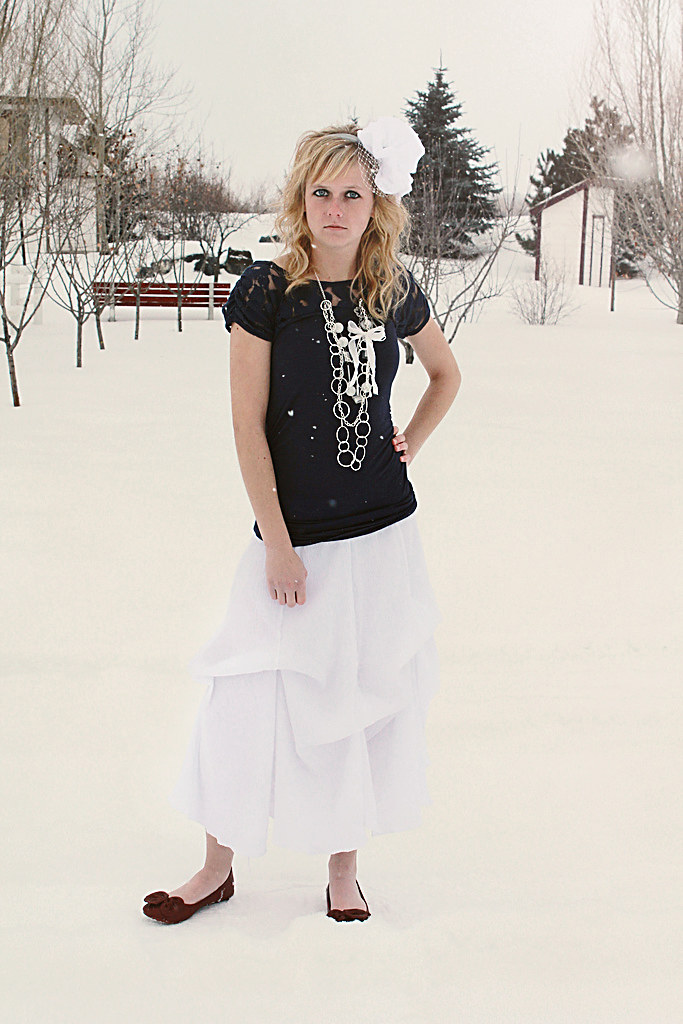
Hello hello!! I am so excited to be showing you all my Prairie Princess Skirt today. I'm pretty sure that it is my all-time favorite thing that I've ever made. It is so versitile and light and extremely frou-frou, which is awesome! Lets get this started.

You'll need:
3 yard of cotton gauze (I found mine at Joanns)
2 inch elastic(enough to fit around your waist, plus an inch)
32 6-in pieces of ribbon or some other kind of tie
freezer paper

First step is to cut out a triangle shape from your freezer paper with a flat top and rounded bottom. My length from top to bottom was roughly 42 inches and the width at the bottom was the width of the freezer paper and the top was approximately 5 inches.

Now lay out the gauze on a flat surface and iron the freezer paper onto the fabric. Make sure that the fabric is turned so that the lines on the gauze will be vertical.

Now cut out around the pattern. Repeat these steps for a total of 8 panels.

Next step is to begin sewing the panels together from top to bottom. I serged mine, but feel free to use a regular sewing machine if that's all you have.

Sew all all of the panels together but do not close the skirt. It should look like this:

Now take a tape measurer and measure from the top of the skirt down 41 inches and pin that length all the way around.

Now attach the last two panels to get the skirts shape and then I used my serger to go around and finish the bottom of the skirt and cut off the excess fabric in one step. If you don't have a serger, simply cut off the excess fabric and do a rolled hem on the bottom.

Now we'll prepare the elastic. I used Dana of MADE's method of sewing and attaching the elastic for her circle skirt and you can find it here.

Then if you have a serger go ahead and finish the top of the skirt.

And attach the elastic to the skirt. It should look like this:

Ok now this is the fun part. Turn your skirt inside out and we'll start pinning where we want the ribbon. Place a tape measurer at the seam on the elastic and starting on the front middle seam place a pin at 8in, 15in, 17in, and 24in.

Move to the next seam and this time you will move the tape measurer up 4 inches and then again pin at 8, 15, 17, and 24.

Alternate the 4 inches up and down the rest of the seams, so every other seam is going to have the ribbons 4 inches higher. Sew the ribbons or ties at each pin with a sewing machine.

It will look like this with all of the ties sewn on:

Now start tying the ribbons together.

By tying each set of ribbons on each seam you get the "All Tied Up" look:

By tying the the highest top set of ribbons and the lowest bottom set of ribons to get "Highs and Lows":

Undo all ties for the look "Let It All Out":

And tie the lowest top set and the highest bottom set for "Caught in the Middle":

So what do you think? And what other looks can you come up with?


Thursday, January 13, 2011

Prairie Princess Skirt and Accessories

Hello!! Welcome to Paisley and Me!! We are back and better than ever! We've decided to come back with a bang and I am so excited to announce...


Our entry into


Over the next week we will have the tutorials for the Prairie Princess Skirt, which can be worn in 4 or more different ways...

All Tied Up:

Highs and Lows:

Let It All Out:

And Caught in the Middle:


We'll also be showing how to make the Prairie Princess Headpiece:


So make sure that you stick around. You don't want to miss these!

Monday, October 11, 2010

The Dreamer Bag Sneak

Whipped up this little lady the other night. I meant to be able to enter it into Purse Week, but I wasn't completely happy with the results by the deadline. After a few adjustments I love it!

I absolutely adore this fabric and have been trying to decide what to do with it.

Love the cute rectangles connecting the straps...

And the personality that the gathered top brings...

Turned out just how I imagined it!

What do you think?

My mom and sister have decided that they want one so I will be working on a tutorial over the next few days with a couple of variation options. Hopefully I will be able to share it with you next week!

Monday, October 4, 2010

Gathered Loopy Scarf

I've been seeing elastic thread all over the place lately and I really wanted to find a project to try it out.  After much debate I decided that I wanted to make myself a scarf. I love scarves. I have about a billion of them, and I could have a billion more and still be wanting. This one is really fun and can be worn loose in the summer or can be wrapped tighter in the winter. I love it!

To make this scarf, I started with some plain white knit fabric


And cut a strip 14 inches wide. It was probably about 5 ft long, though I didn't measure, you can make it as long or as short as you want.


I used the Dritz brand elastic thread. I was about $1.50 a spool and can be found with the elastic at Joann's.


Hand thread the bobbin with the elastic thread and use plain thread on the top of your sewing machine. I used a straight stitch at a 2 1/2 length and set the tension on my machine to the highest setting possible. Starting at the bottom of my scarf, I started sewing an S shape through the length of the scarf.


And sewed clear from one end of the scarf to the other.


Next I folded it in half hotdog way, right sides together, and sewed along the edge.


And flipped the scarf right side out.


Next I took the two ends and sewed them together.


And that's it. Super easy and way fun. I love this plain but just think of all of the different fabric options and colors and patterns you could do!


Simply Yours Designs: Cute Blog Designs