Monday, September 20, 2010

Oh Goody!- CSN Stores + Dimensional Magic Winners!

Winners for both giveaways of the Mod Podge Dimensional Magic can be found at the end of this post!

So how many of you have made it over to CSN stores yet? Anyone? If not you have got to head over and take a look. You would not believe all of the amazingness that you can find there. It's a one stop shop for everything from console tables 
to shoes!!

And so so so much more!

And oh do I love a good pair of shoes. So when they asked us to do a review for them, of course I said, well, of course!!! Now I just need to decide exactly what it is that I want. In the meantime, you should all head on over to CSN.com and check out all of the amazingness yourselves! Happy shopping!


So now without further ado, our winners of the Mod Podge Dimensional Magic are......

Jewels who said


And our second bottle will be going to

Michelle who said

Congratulations ladies! Please leave a comment or email us with addresses to get this to you. I know you are going to have so much fun with it!!!

Friday, September 17, 2010

Flip Flop Friday with Flamingo Toes

Hi Everybody! My name is Beverly and I blog over at Flamingo Toes.


I'm excited to be here at Scraps N' Strings!

Over at Flamingo Toes you'll find sewing and embroidery projects, home decor projects, and jewelry.

I have lots of tutorials, lots of giveaways - and hopefully you'll have lots of fun visiting!

One of my favorite things to make are aprons - and I have a fun new one to share with you today!

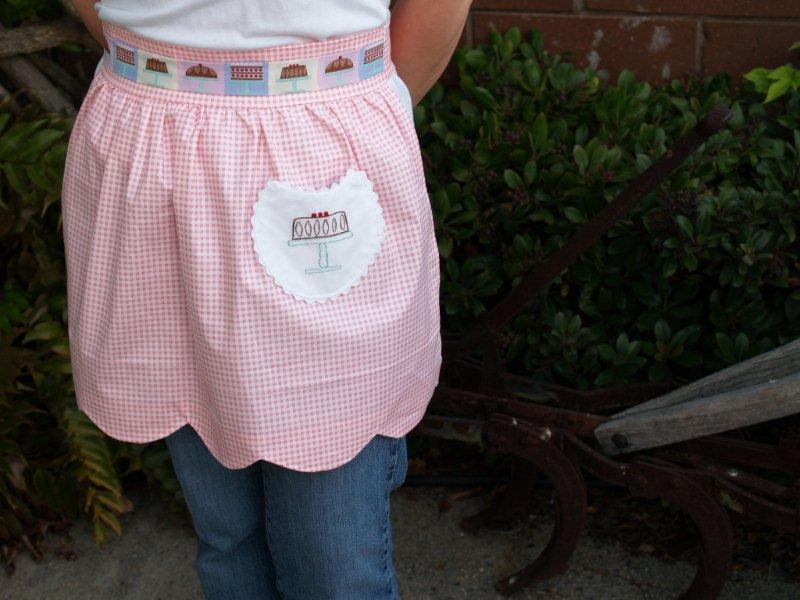
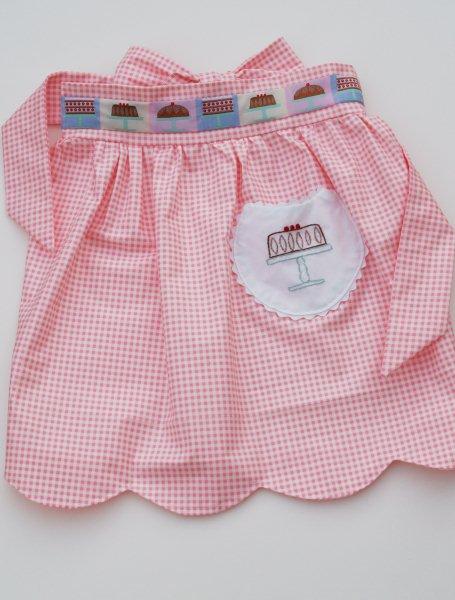
I call it the "Let's Eat Cake" Apron.

Because it's always time for cake.


I don't think you can have enough aprons.

And if by some chance you think you do have enough - this one would make a great gift too!

(Did you know Christmas is 97 days away? Ack!)

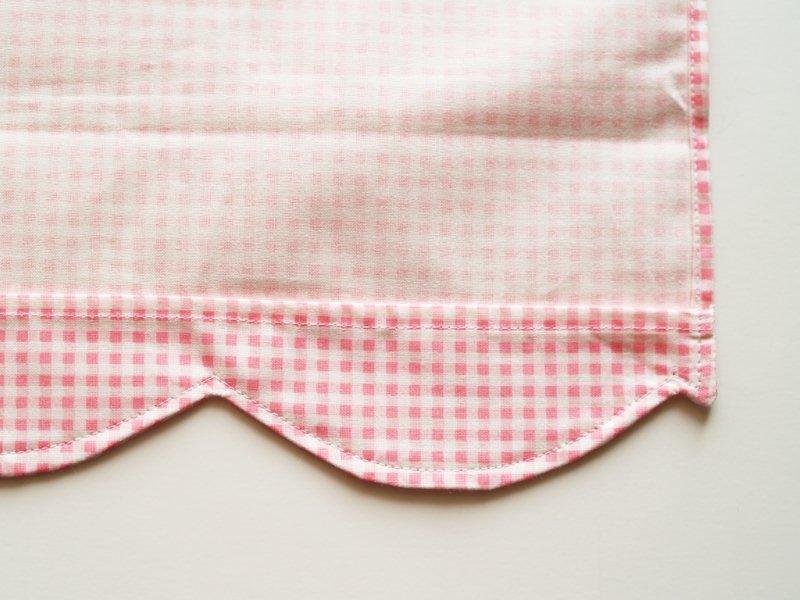
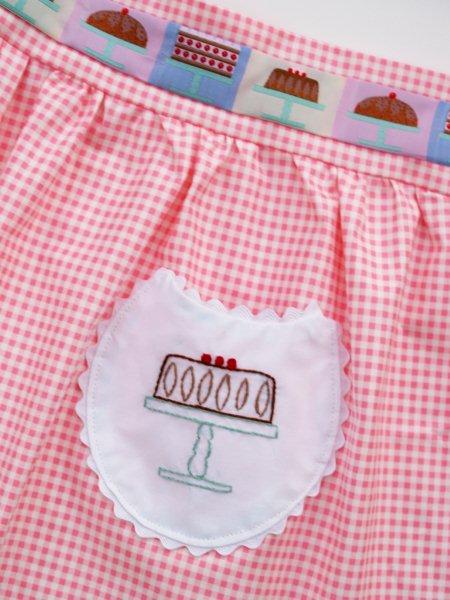
This super cute apron is decked out with cake ribbon and embroidery and is finished at the hem with a retro-y (yes. That's a word.) scalloped border. If you can't find cake ribbon, you could take the methods used in this tutorial and adapt them to any ribbon, to coordinate with your decor and style!

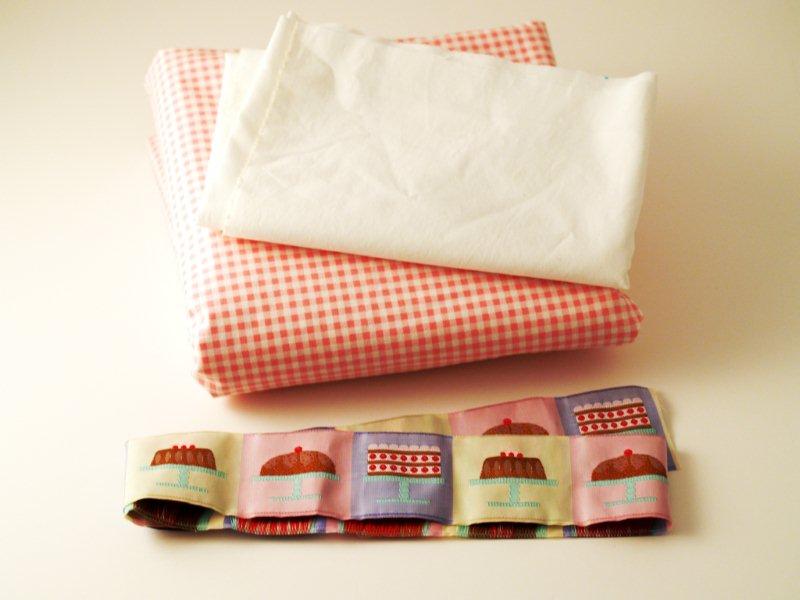
Ready to get started? Here's what you'll need:

• Fabric for Apron - about 1 yard

• Small piece of contrasting fabric for pocket - about 10" x 20"

• Decorative Ribbon - about 16"

• Ric Rac

• Embroidery Floss - colors to coordinate with your ribbon

• Thread


Start by making your pocket.

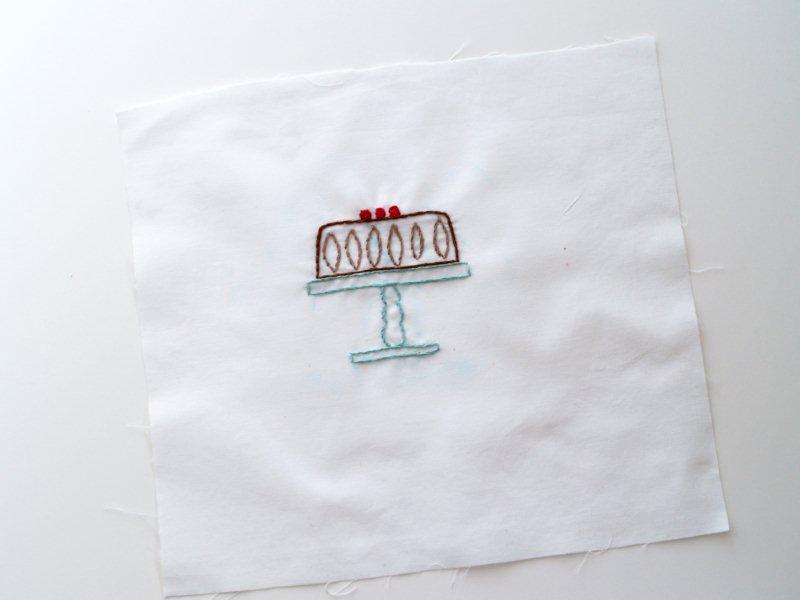
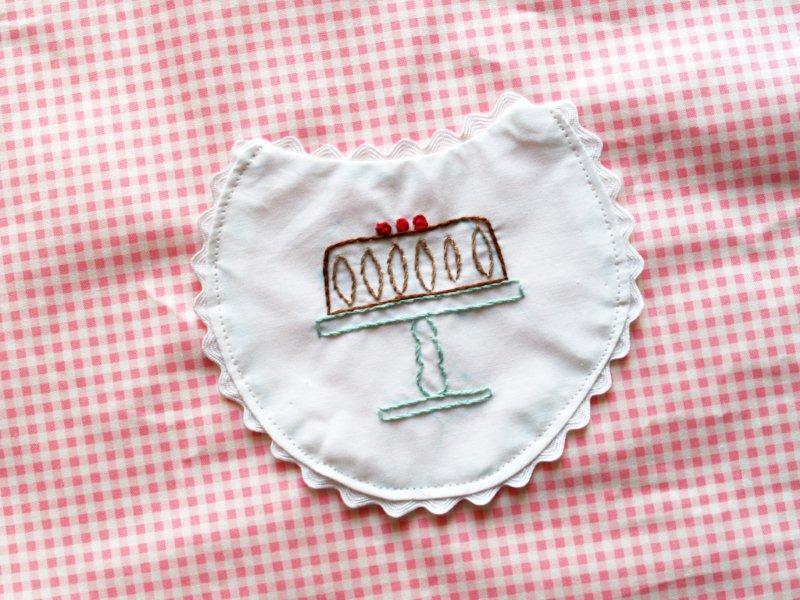
Redraw a design from your ribbon onto a 10" x 10" piece of contrasting fabric with a disappearing fabric pen.

I chose one of the cake styles. The overall size of the design was 2 1/2" x 2 1/2".


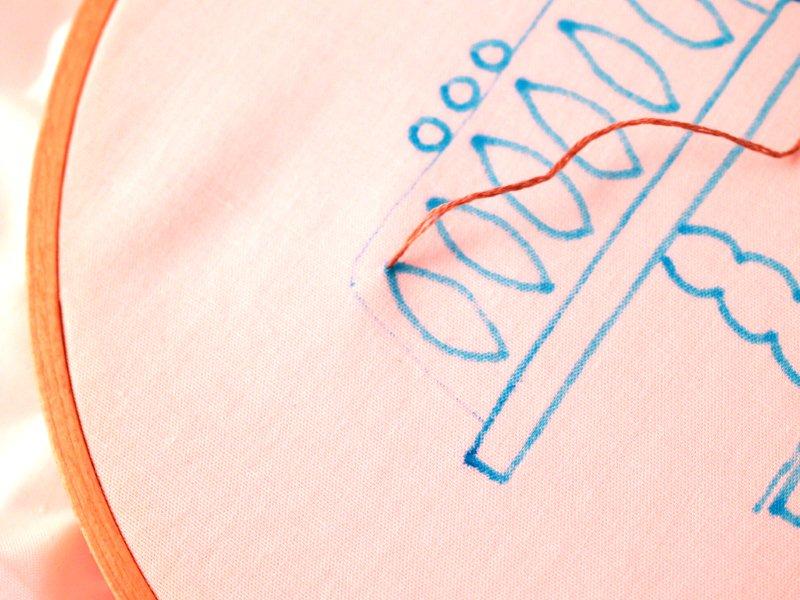
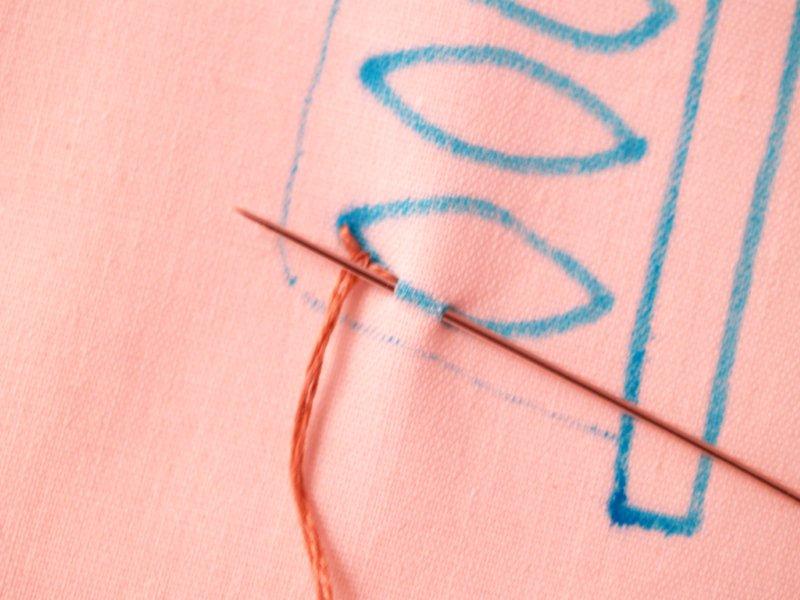
Put your fabric in an embroidery hoop. Outline your drawn lines with a stem embroidery stitch, in the colors that match your ribbon.

To do this, separate your embroidery floss, threading your needle with 3 strands.

Knot the thread and bring it up at one corner of your design.


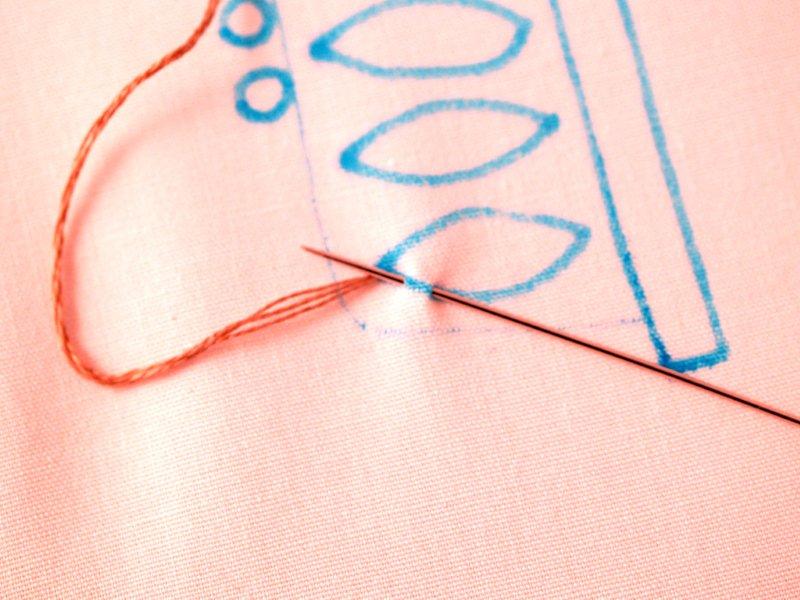
Bring your needle from front to back to front again, facing the place where your thread came up. The distance between the thread and the stitch should be about the same.


Pull the thread through the fabric.


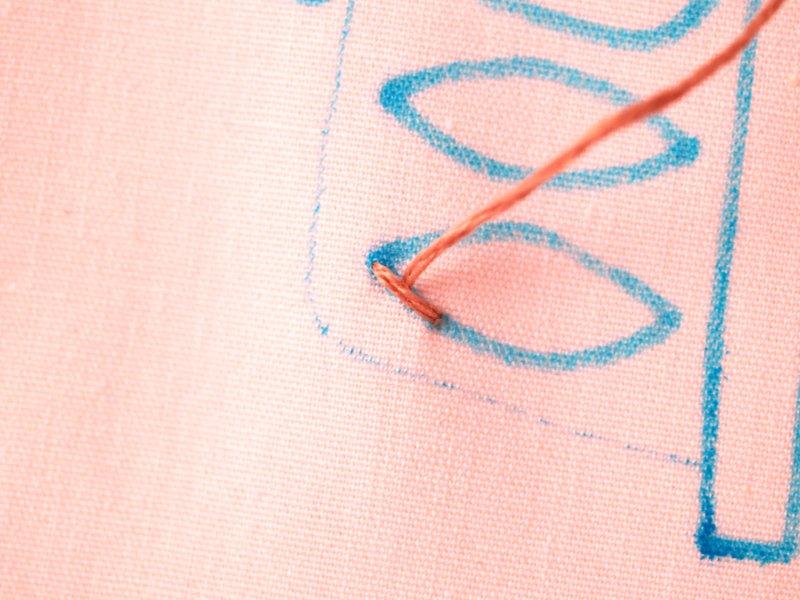
Hold the loose part of the thread downward, and then make another stitch just like the first, with the needle coming up where the first stitch ends.


Continue making stitches around all the lines, making sure to hold the thread end the same direction before each stitch.

(If you need help with these stitches, send me an email! I'd love to help!)


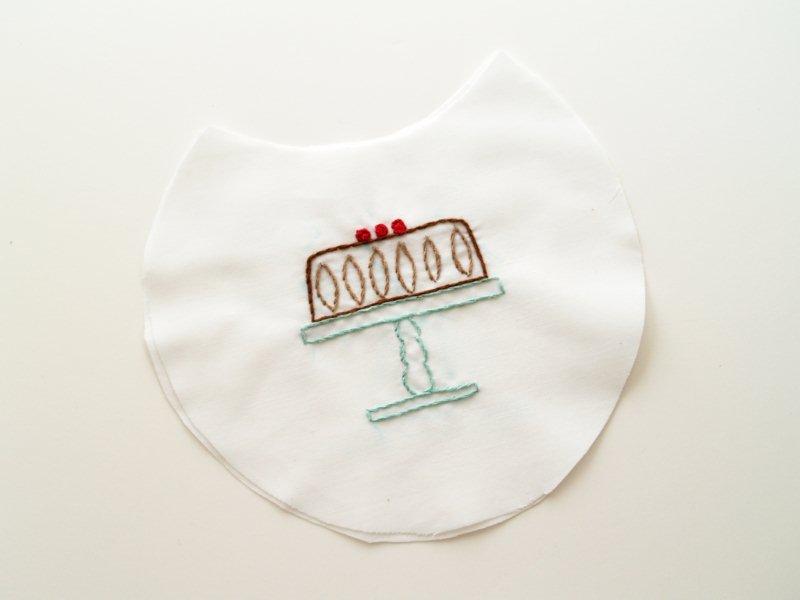
Using a bowl or other rounded item, trace 3/4 of a circle around the design. Move the bowl up and trace the bottom again so the top of the circle is scooped too. Cut out your pocket and cut this shape out of your remaining contrasting fabric as well.


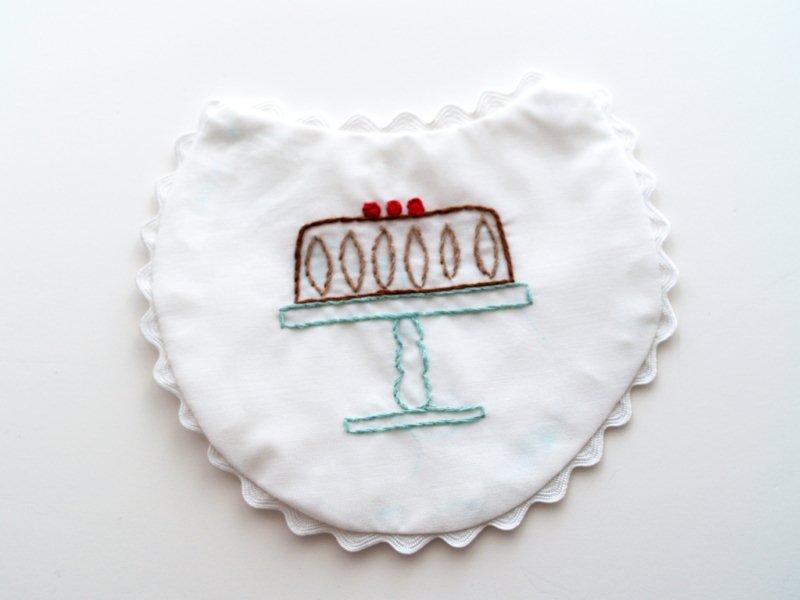
Place your two pocket pieces right sides together. Lay the ric rac between the pieces.

Sew around the sides of the pocket, catching half the ric rac. Leave a small section open at the bottom for turning.

Clip around the pocket up to the seam and trim off the corners so it will turn well.


Turn the pocket right sides out and press.


Cut our a large rectangle for your apron skirt - 27" x 16".

Mark the center bottom point on the long side of the rectangle. Use the same bowl to trace scallops onto the bottom of the apron, centering the first scallop over the halfway point.


Cut your scallops out.

Cut out a 3" x 27" rectangle. Lay your apron skirt over this piece and cut out the bottom edge so it is scalloped also.

This is your hem facing.


Hem the top, straight edge of the facing. Turn the edge over twice and sew.


With right sides together and the scalloped ends together, sew the bottom pieces of the apron and hem facing. Sew along the sides as well.

Clip the curves up to the seam and clip little "v's" out of the top corners of the scallops.

Don't clip through the seam. It makes you say fake swear words. Trust me.


Turn the scallops right sides out, with the hem facing to the back. Press the scallops down.

Hem the sides of your apron skirt and sew along the edges of your scallops, 1/4" from the edge.


Determine where you'd like your pocket and pin it on. Mine is 3" from the top of the apron skirt and 4 1/2" from the left edge.

Sew around the pocket, except for the top. Make sure you catch the section you left open for turning.


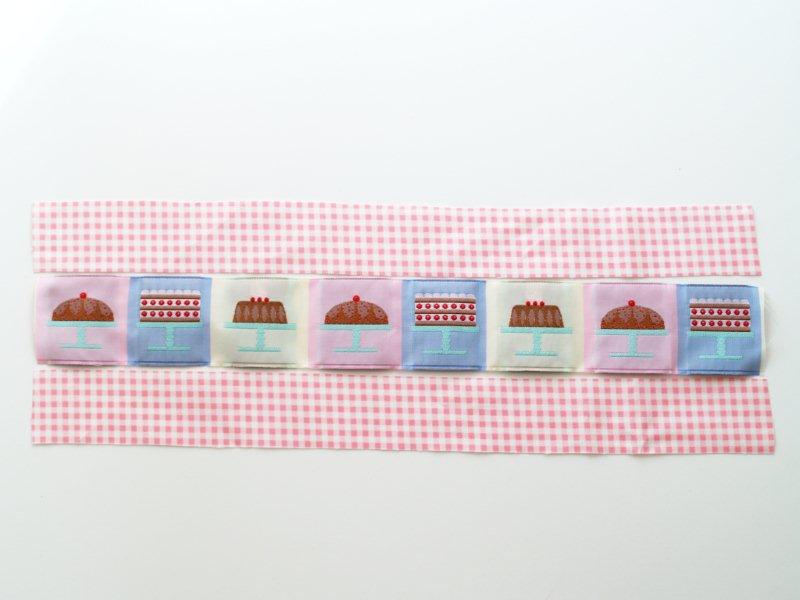
Cut two rectangles of apron material to sew to the top and bottom of your ribbon, 1 1/4" x 16".


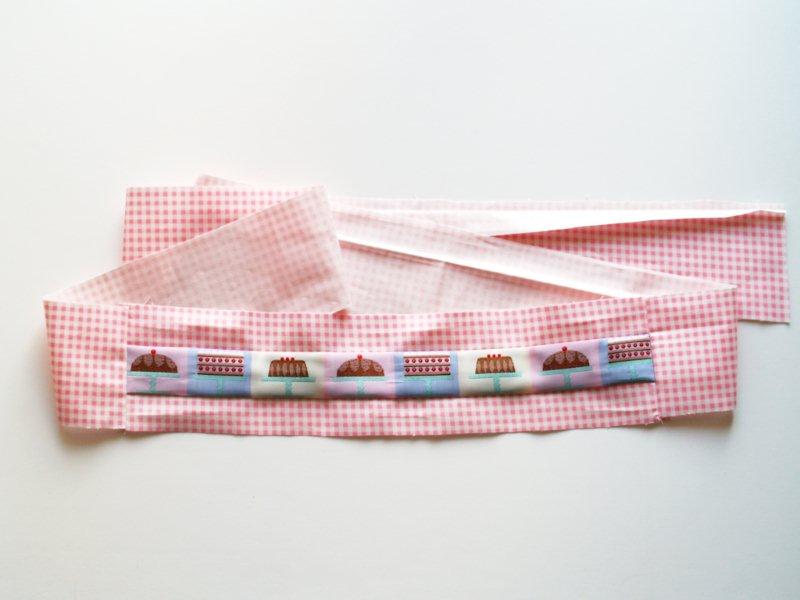
Sew these to the top and bottom of your ribbon with a 1/8" seam. Press the seams towards the center.

Cut out 4 rectangles for your ties, 3" x 36"

Cut out a back waistband piece also, 3" x 16".

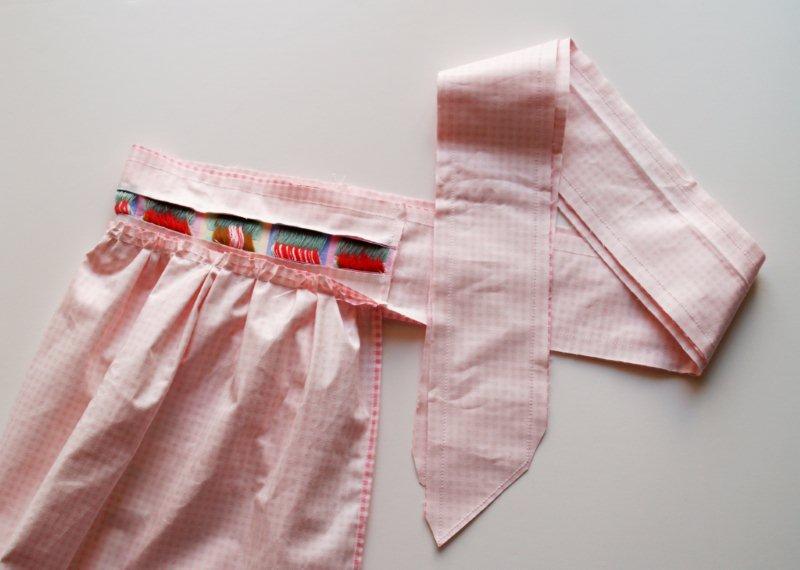
Sew a tie piece to each side of your center waistband piece.


Sew the remaining two tie pieces to either side of your waistband back piece.

Gather the top of your apron skirt so that it measures 16".

Pin and sew the apron skirt to the center waistband front, right sides together.


Fold the waistband piece back up and lay the other waistband piece and ties over it, right sides together. Sew around the ties on all three sides and sew along the top of the waistband pieces. If you want, angle the ends of the ties. Leave the bottom section of the waistband open.


Turn the ties and waistband right sides out. Press well.

Turn the bottom of the waistband back piece under 1/2" and hand sew down.

You're all done!! What a cute apron you've made!!

Doesn't it make you want to bake a cake?

Or maybe put it on and eat a cake? Either way, you will look so cute.


You could shrink your measurements down and make this for any little helpers you might have around the kitchen too!


I hope you enjoyed the tutorial!!

Thanks so much for having me over at Scraps N' Strings -

I'd love if you'd stop by and say hi over at Flamingo Toes!

Wednesday, September 15, 2010

Picture Plaques with Mod Podge Dimensional Magic + Giveaway

So I have one more fun project for you, this time showing how you can use Mod Podge Dimensional Magic as an accent to your project to add a lot of personality and help bring out those little details that we all work so hard on. These are just some cute little picture plaques that I made up for a craft at a recent family reunion. And do you know what? Everyone loved the Dimensional Magic, from a 10 year old cousin to 50+ year old aunt. It's just so easy to use!

To start this project off I cut out an 8x8" piece of 1/4" thick wood.
-Here's a tip, go to your local hardware store to find wood for projects like this. Craft stores mark their prices WAY up because they are for crafts, and you can usually get a lot more product for a lot cheaper at your local Home Depot, Ace Hardware, or Lowe's-
I painted down a thin layer of Mod Podge
And then added some scrapbook paper over the top. I recommend laying your paper out how you want it before you start going all crazy with the Mod Podge, I just didn't get a picture of this step... And then paint on another layer of Mod Podge over the top to seal it. I suggest using the gloss Mod Podge to seal the paper down, I just love the finished look that it gives.
Next step, after your Mod Podge has dried completely, is to add some embellishments. Flowers, pearls, ribbons, you can use anything that you have laying around, and hot glue them onto your board.
Next I drilled a hole in each of the top 2 corners and threaded some sturdy wire through and looped it. This make the plaque easy to hang and it just cute.
Then I selected the picture that I wanted for my plaque and pinned it in place with 2 thumbtacks. I put a tiny dab of Mod Podge on the tack and added a little matching circle of paper to the top of each one.
And applied my Dimensional Magic to each one and allowed them to dry. (For tips on using Mod Podge Dimensional Magic, check out our last post for the Mod Podge Dimensional Magic Dog Tags)
It added so much character to the plaques and helped pull out a lot of the colors of the project and just added some additional visual interest.
I just loved that there are so many different things that you can do with this project, and capture just about any kind of personality with it!

So are you worried that you aren't going to win the Dimensional Magic from our last giveaway. Well Mod Podge Amy has been so generous as to allow us to do a SECOND giveaway of the Dimensional Magic. I know, she does rock. And what do you need to do? Simply leave a comment telling us why you are so desperate to get Mod Podge Dimensional Magic that you simply must enter another giveaway for it!


GOOD LUCK!
Giveaway closes on Sunday 9/19 at midnight MST and the winner will also be announced the following Monday!

Monday, September 13, 2010

Dog Tag Keychains with Mod Podge Dimensional Magic + Giveaway

This Giveaway is now closed!
A couple of months ago, we were contacted by Amy of Mod Podge Rocks! and Paint Me Plaid fame, and asked if we would be interested in doing a review of an awesome plaid product (of my choice). Well I had been dying to get my hands on some Mod Podge Dimensional Magic since it came out, but, alas, was unable to find it anywhere in town, so of course I told Amy that I would love nothing more than to try it out for myself and tell you all what I thought about it! And can I tell you something? It was everything that I had dreamed of and more. Whether it is the star of your project or you are just using it as an accent, it adds so much character to whatever you are working on. It dries crystal clear and I had no problem with color bleeding or with the product running anywhere other than where I put it. A couple tips: 1) Get your bottle out a couple of hours before you start your project to ensure that it doesn't have any bubbles in it. I found it a little bit difficult to remove bubbles from my project, but by letting the bottle sit still, it got rid of the problem  2) Make sure that your product has time to dry fully before handling, it's a little hard to fix a mess up   3) When doing a double-sided project like the one I'm showing you today, make sure that when you flip it over to apply Dimensional Magic to the other side, lay your project on something soft like a dishtowel. Laying it on a flat surface can cause it to stick and leave marks if it isn't completely dry (I say at least 24 hrs) and   4) When ready to use the product, dab a tiny bit on a paper towel to get all of the air out of the tip before applying.

So for today's project I am showing you a project where Dimensional Magic is the star. This is my dog tag key chain. I have a lot of military in my family. Besides my husband, I also have a brother in the Navy, a brother-in-law and uncle in the Army, and Grandparents who have served in the military. This particular project I made for my father-in-law who is currently serving in Afghanistan so that he would have a picture of my boys (currently his only grandbabies) with him at all times. I picked up this plain dog tag at my local Army Surplus store. It's just down the street from my parents house which is super convenient when you are looking to make a dog tag key chain. I've also seen them as scrapbooking supplies, but I don't think that they are as sturdy as the real thing.
My first step was to trace the dog tag onto some cardstock and cut it out.
I did have to trim it down a tiny bit so that it would fit inside the edging of the dog tag, but this gives you a good place to start.
Then I used the pattern to cut out a picture of each of my boys that I had printed of earlier. (Dog tags are approximately 1x2" so it needs to be a little pic.)
Next I place the picture into the tag and turned it over to draw in where the hole in the top needed to go.
And then punched a little hole at the mark on each picture.
Then I painted a thin layer of mod podge directly onto the dog tag and laid the picture on top, flattening out any air bubbles. Then I turned it over and repeated on the other side. If you only have one pic don't worry about doing anything to the other side, just leave it in its original state.
Now take your Mod Podge Dimensional Magic and lay a coat down on one side of the tag. It looks blurry and milky when you first apply it, but as it dries it will clear up completely, allowing the picture to show through is if it had nothing on it at all.
When it dries completely (I would recommend waiting about 4 hours at least!! Overnight if you have the time) turn it over and do the same thing to the other side. I actually did 2 coats on mine. One on each side and then when it was done I repeated the process because I loved the thicker look, and it still dried completely clear. And I ended up with a really cool sentiment for my father-in-law that he could keep with him while he's gone, and to help keep his spirits up!


So what do you think? Do you like it? Do you want some Dimensional Magic to try out for yourself? If so, then today is your lucky day! We will be giving one lucky reader their own bottle of Mod Podge Dimensional Magic so that you can try it out for yourselves and see how you like it. All you have to do is leave us a comment telling us what you would like to use your very own Mod Podge Dimensional Magic for. Easy Peasy.


GOOD LUCK!
Giveaway closes on Friday 9/17 at midnight MST and the winner will be announced the following Monday!

For more fabulous ideas for using Dimensional Magic head on over to Mod Podge Rocks! to see some other great projects like this and this. Or check her out on facebook where she is always highlighting different Mod Podge projects, including ones where Dimensional Magic is involved!!!


Simply Yours Designs: Cute Blog Designs