
I'm excited to be here at Scraps N' Strings!
Over at Flamingo Toes you'll find sewing and embroidery projects, home decor projects, and jewelry.
I have lots of tutorials, lots of giveaways - and hopefully you'll have lots of fun visiting!
I have lots of tutorials, lots of giveaways - and hopefully you'll have lots of fun visiting!
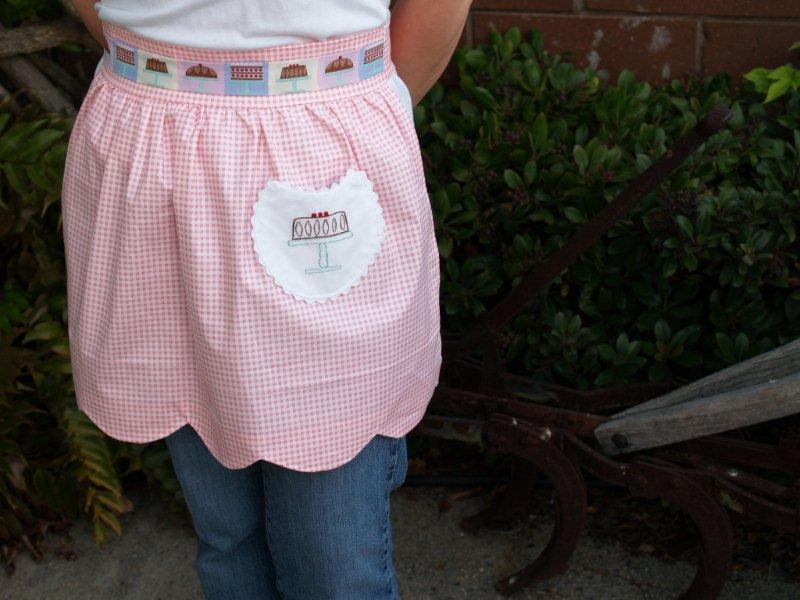
One of my favorite things to make are aprons - and I have a fun new one to share with you today!
I call it the "Let's Eat Cake" Apron.
Because it's always time for cake.
Because it's always time for cake.
I don't think you can have enough aprons.
And if by some chance you think you do have enough - this one would make a great gift too!
(Did you know Christmas is 97 days away? Ack!)
And if by some chance you think you do have enough - this one would make a great gift too!
(Did you know Christmas is 97 days away? Ack!)
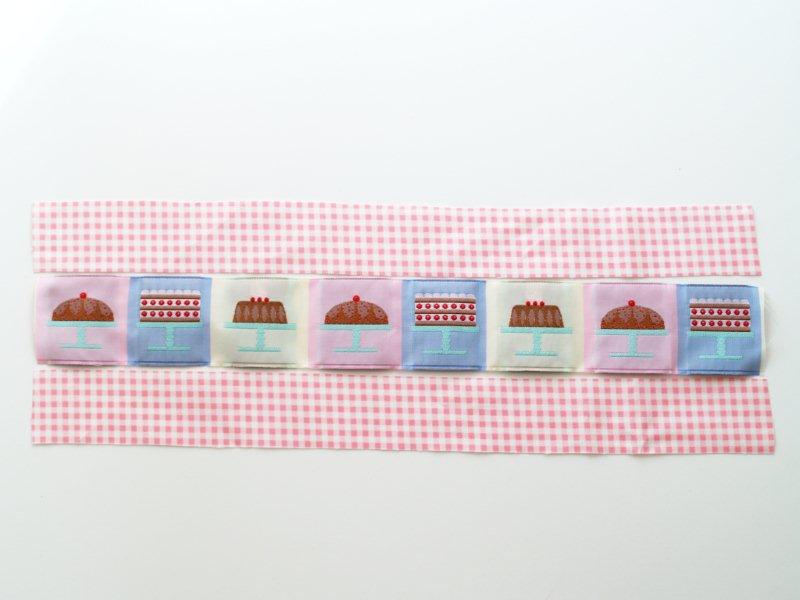
This super cute apron is decked out with cake ribbon and embroidery and is finished at the hem with a retro-y (yes. That's a word.) scalloped border. If you can't find cake ribbon, you could take the methods used in this tutorial and adapt them to any ribbon, to coordinate with your decor and style!
Ready to get started? Here's what you'll need:
• Fabric for Apron - about 1 yard
• Small piece of contrasting fabric for pocket - about 10" x 20"
• Decorative Ribbon - about 16"
• Ric Rac
• Embroidery Floss - colors to coordinate with your ribbon
• Thread
• Small piece of contrasting fabric for pocket - about 10" x 20"
• Decorative Ribbon - about 16"
• Ric Rac
• Embroidery Floss - colors to coordinate with your ribbon
• Thread
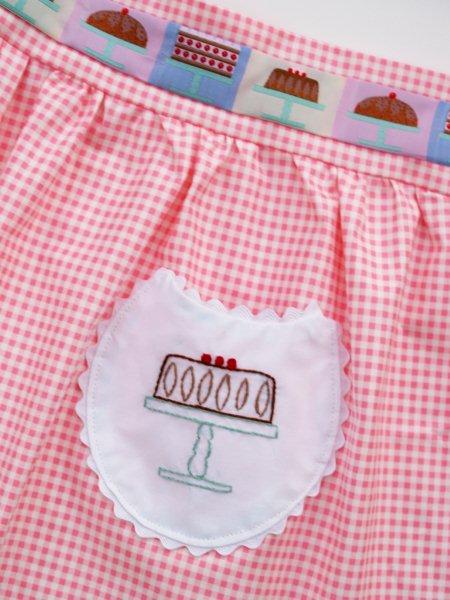
Start by making your pocket.
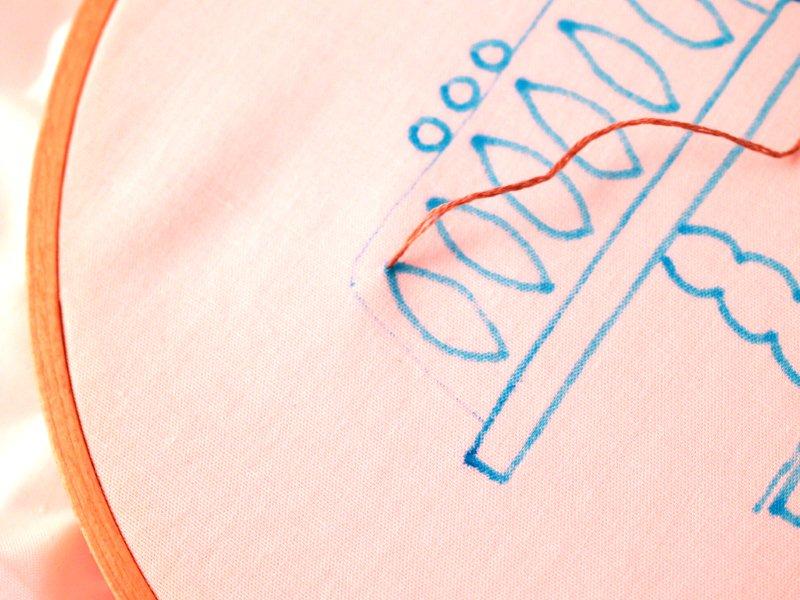
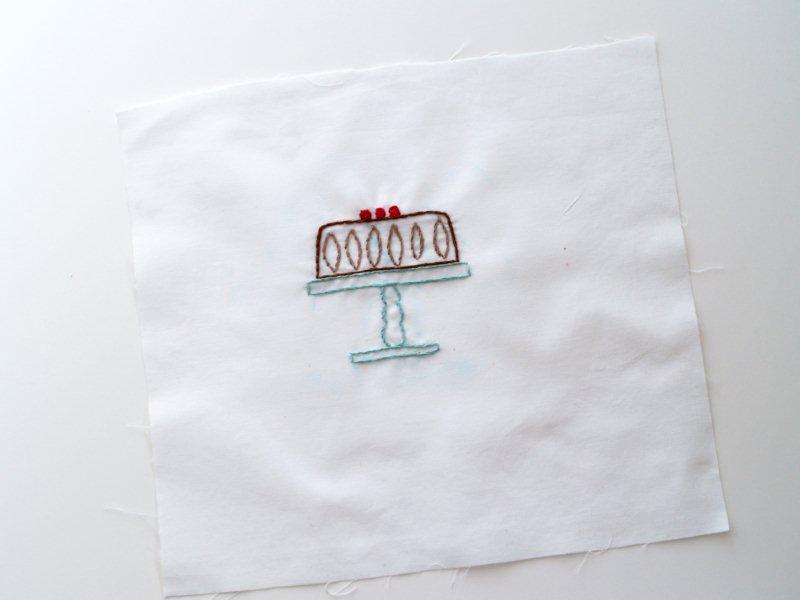
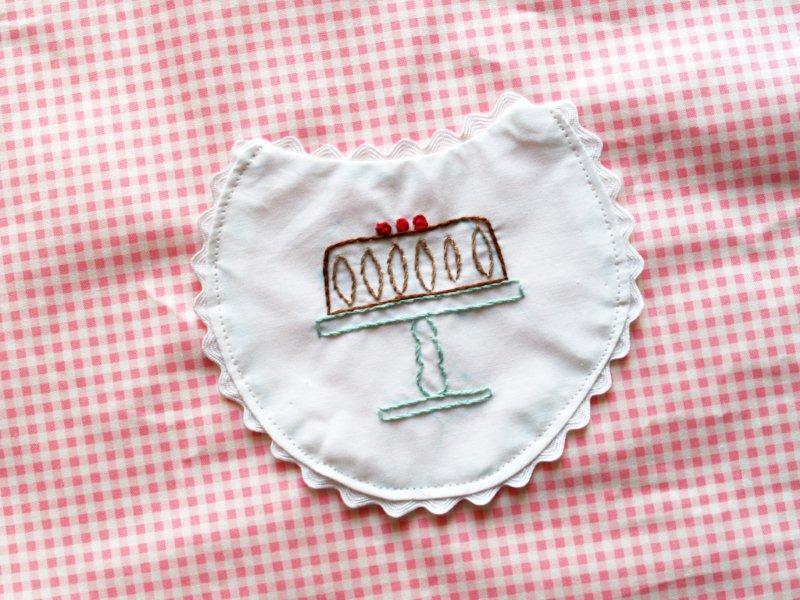
Redraw a design from your ribbon onto a 10" x 10" piece of contrasting fabric with a disappearing fabric pen.
I chose one of the cake styles. The overall size of the design was 2 1/2" x 2 1/2".
Redraw a design from your ribbon onto a 10" x 10" piece of contrasting fabric with a disappearing fabric pen.
I chose one of the cake styles. The overall size of the design was 2 1/2" x 2 1/2".
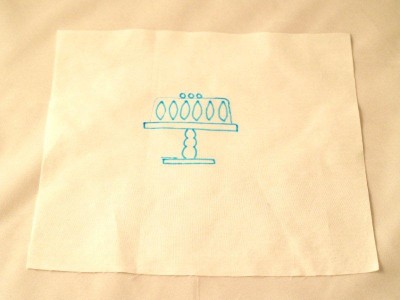
Put your fabric in an embroidery hoop. Outline your drawn lines with a stem embroidery stitch, in the colors that match your ribbon.
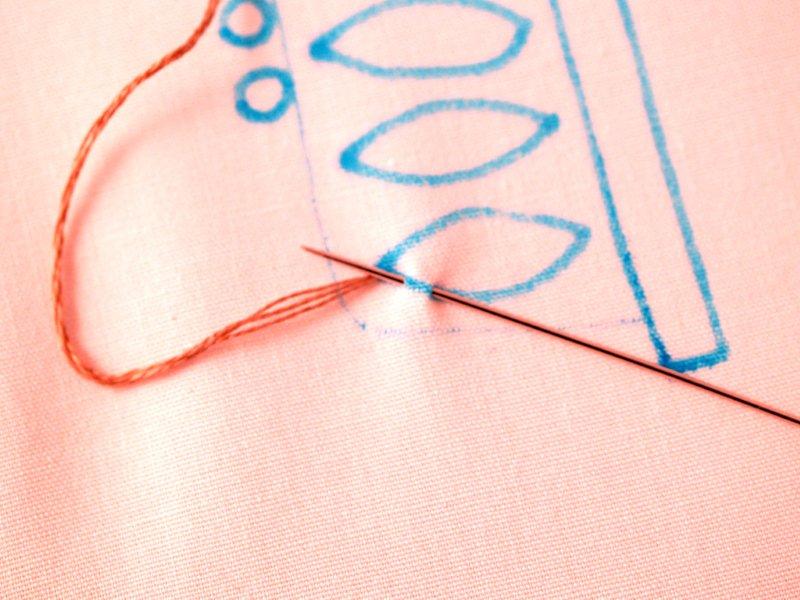
To do this, separate your embroidery floss, threading your needle with 3 strands.
Knot the thread and bring it up at one corner of your design.
To do this, separate your embroidery floss, threading your needle with 3 strands.
Knot the thread and bring it up at one corner of your design.
Bring your needle from front to back to front again, facing the place where your thread came up. The distance between the thread and the stitch should be about the same.
Pull the thread through the fabric.
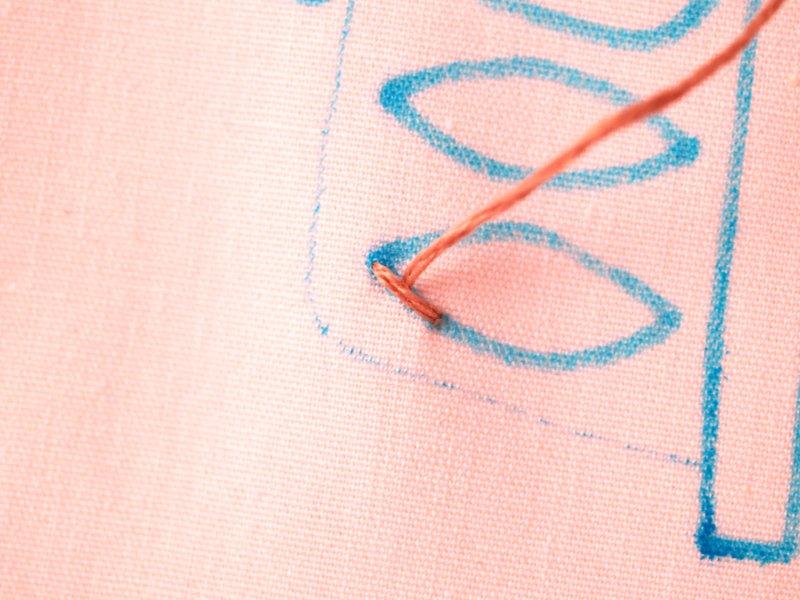
Hold the loose part of the thread downward, and then make another stitch just like the first, with the needle coming up where the first stitch ends.
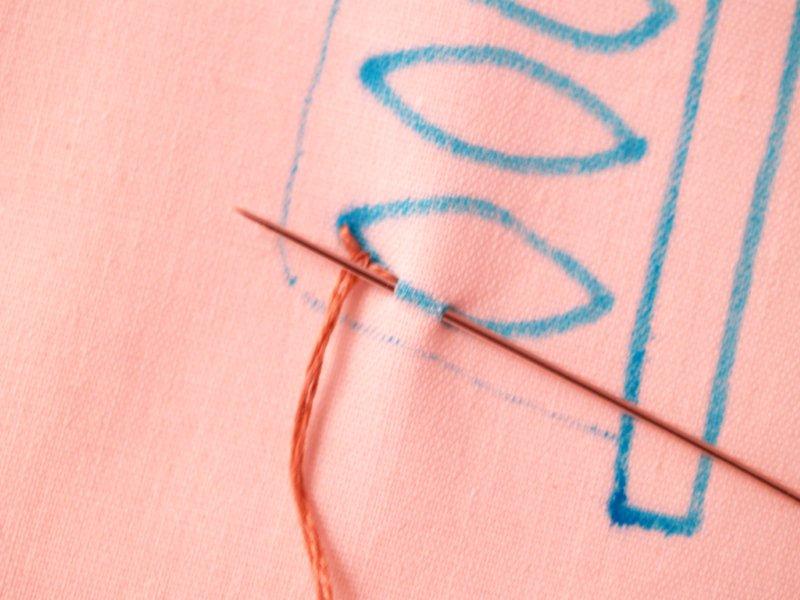
Continue making stitches around all the lines, making sure to hold the thread end the same direction before each stitch.
(If you need help with these stitches, send me an email! I'd love to help!)
(If you need help with these stitches, send me an email! I'd love to help!)
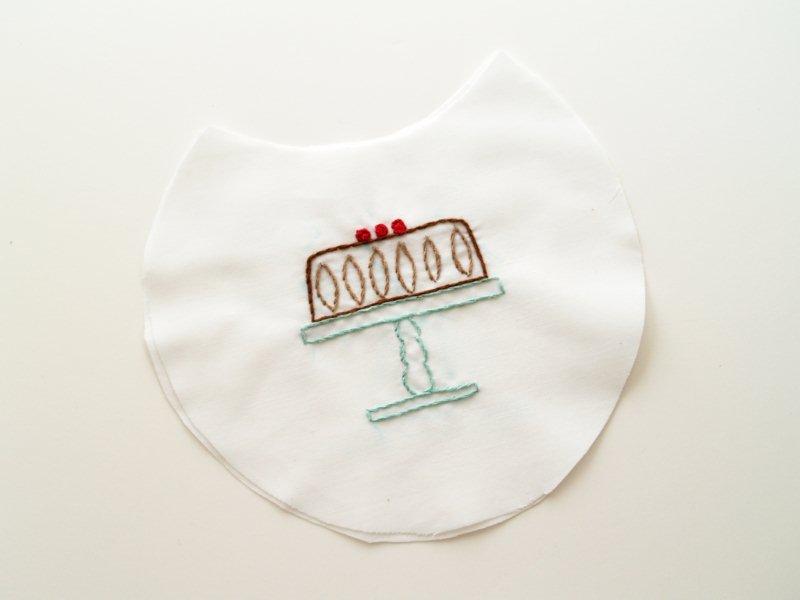
Using a bowl or other rounded item, trace 3/4 of a circle around the design. Move the bowl up and trace the bottom again so the top of the circle is scooped too. Cut out your pocket and cut this shape out of your remaining contrasting fabric as well.
Place your two pocket pieces right sides together. Lay the ric rac between the pieces.
Sew around the sides of the pocket, catching half the ric rac. Leave a small section open at the bottom for turning.
Clip around the pocket up to the seam and trim off the corners so it will turn well.
Sew around the sides of the pocket, catching half the ric rac. Leave a small section open at the bottom for turning.
Clip around the pocket up to the seam and trim off the corners so it will turn well.
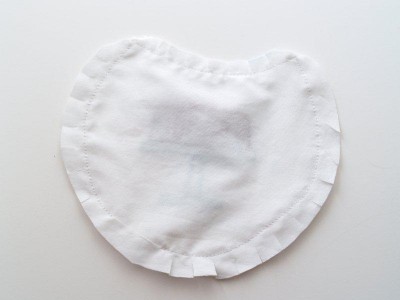
Turn the pocket right sides out and press.

Cut our a large rectangle for your apron skirt - 27" x 16".
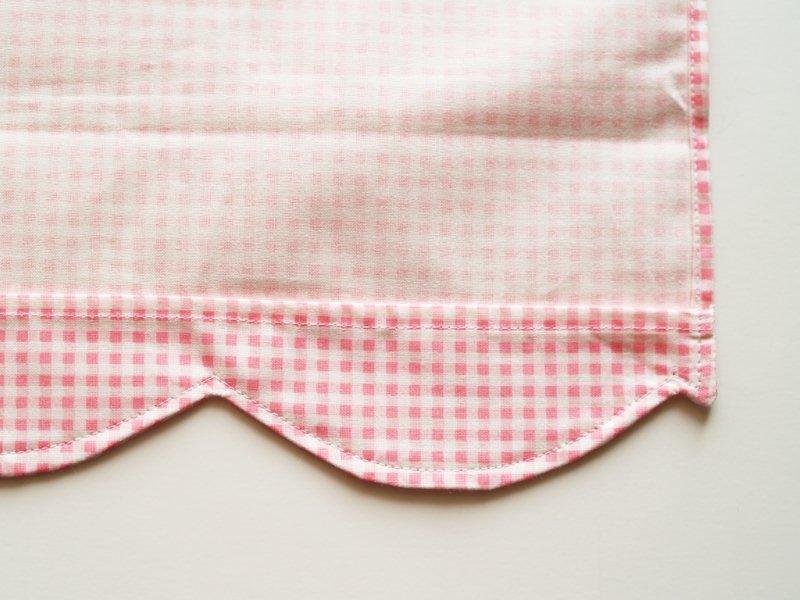
Mark the center bottom point on the long side of the rectangle. Use the same bowl to trace scallops onto the bottom of the apron, centering the first scallop over the halfway point.
Mark the center bottom point on the long side of the rectangle. Use the same bowl to trace scallops onto the bottom of the apron, centering the first scallop over the halfway point.

Cut your scallops out.
Cut out a 3" x 27" rectangle. Lay your apron skirt over this piece and cut out the bottom edge so it is scalloped also.
This is your hem facing.
Cut out a 3" x 27" rectangle. Lay your apron skirt over this piece and cut out the bottom edge so it is scalloped also.
This is your hem facing.

Hem the top, straight edge of the facing. Turn the edge over twice and sew.

With right sides together and the scalloped ends together, sew the bottom pieces of the apron and hem facing. Sew along the sides as well.
Clip the curves up to the seam and clip little "v's" out of the top corners of the scallops.
Don't clip through the seam. It makes you say fake swear words. Trust me.
Clip the curves up to the seam and clip little "v's" out of the top corners of the scallops.
Don't clip through the seam. It makes you say fake swear words. Trust me.

Turn the scallops right sides out, with the hem facing to the back. Press the scallops down.
Hem the sides of your apron skirt and sew along the edges of your scallops, 1/4" from the edge.
Hem the sides of your apron skirt and sew along the edges of your scallops, 1/4" from the edge.
Determine where you'd like your pocket and pin it on. Mine is 3" from the top of the apron skirt and 4 1/2" from the left edge.
Sew around the pocket, except for the top. Make sure you catch the section you left open for turning.
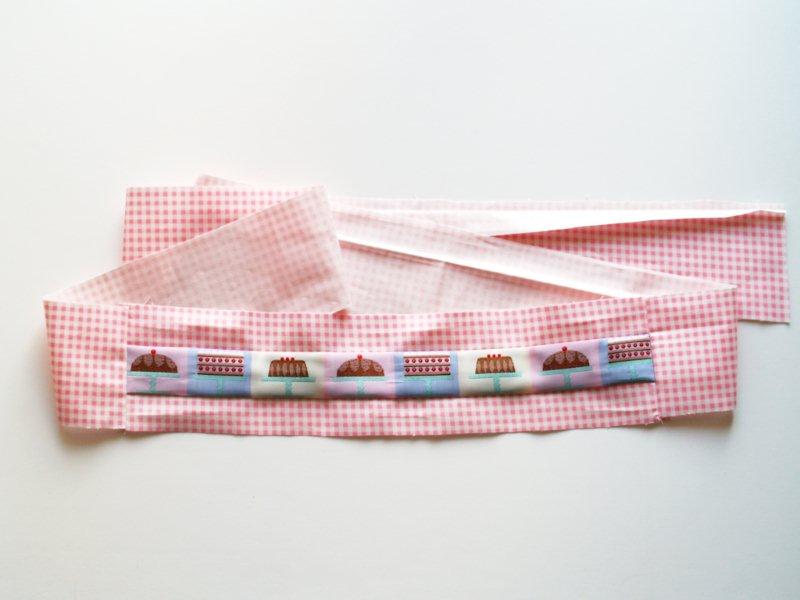
Cut two rectangles of apron material to sew to the top and bottom of your ribbon, 1 1/4" x 16".
Sew these to the top and bottom of your ribbon with a 1/8" seam. Press the seams towards the center.
Cut out 4 rectangles for your ties, 3" x 36"
Cut out a back waistband piece also, 3" x 16".
Cut out a back waistband piece also, 3" x 16".
Sew a tie piece to each side of your center waistband piece.
Sew the remaining two tie pieces to either side of your waistband back piece.
Gather the top of your apron skirt so that it measures 16".
Pin and sew the apron skirt to the center waistband front, right sides together.
Pin and sew the apron skirt to the center waistband front, right sides together.
Fold the waistband piece back up and lay the other waistband piece and ties over it, right sides together. Sew around the ties on all three sides and sew along the top of the waistband pieces. If you want, angle the ends of the ties. Leave the bottom section of the waistband open.
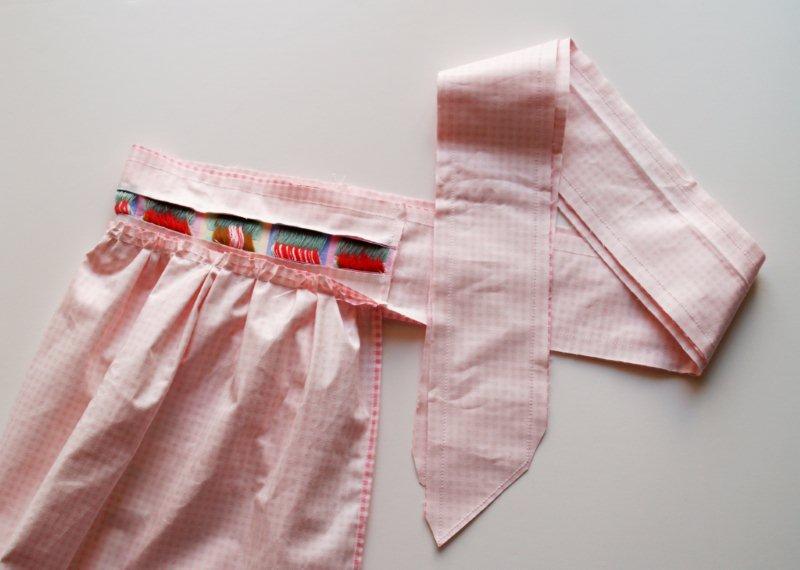
Turn the ties and waistband right sides out. Press well.
Turn the bottom of the waistband back piece under 1/2" and hand sew down.
You're all done!! What a cute apron you've made!!
Doesn't it make you want to bake a cake?
Or maybe put it on and eat a cake? Either way, you will look so cute.
Doesn't it make you want to bake a cake?
Or maybe put it on and eat a cake? Either way, you will look so cute.

You could shrink your measurements down and make this for any little helpers you might have around the kitchen too!
I hope you enjoyed the tutorial!!
Thanks so much for having me over at Scraps N' Strings -
I'd love if you'd stop by and say hi over at Flamingo Toes!
I'd love if you'd stop by and say hi over at Flamingo Toes!


6 comments:
Wow! What a great blog swap!
I love this apron, and would totally buy it!
This apron is awesome! And looks so easy to make. Thanks, Bev, for the great tutorial! ;)
CUTE apron! Everything Flamingo Toes doe sis pretty amazing though!
I love it!! Do you mind if I put a link to this tutorial on my blog? I have to know where you got the ribbon Beverly? I collect aprons and I am a cake decorator, so I'm in love!!
missy93073@yahoo.com
Thanks everyone for the sweet comments! Missy, I don't mind at all :)
I got the ribbon in a little shop in North Carolina. I'll see if I can get in touch with them and find out if they sell online. I'll email you! :)
Bev, I love your apron tutorial! Yours are always so easy to understand. I am going to put this on my list of Christmas gifts to make for several I know who love aprons. They would make great teacher gifts, too. Thanks!
Post a Comment